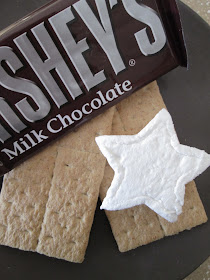
When I think of celebrating American patriotic holidays, I think outdoors, barbeques, and bonfires. And of course, with bonfires, come S'mores. I'm not sure how many of you have tried S'mores with homemade marshmallows, but you have not lived. I can promise that after this, you won’t want them any other way. This marshmallow recipe is great because it's super easy. It's been slightly adapted from Alton Brown's marshmallow recipe, and I've included some tips and tricks that I've learned through experience. Happy baking!

You need:
- 3 packages unflavored gelatin – you can find it in the baking aisle
- 1 cup super cold water – I stick a cup in the freezer while I prep everything else
- 1 ½ cups sugar
- 1 cup light corn syrup
- ¼ teaspoon salt
- 1 ½ teaspoon vanilla extract – you can totally switch this up with any number of extracts. I’m thinking peppermint marshmallows, banana marshmallows, strawberry marshmallows…
- ¼ cup powdered sugar
- ¼ cup cornstarch
- Nonstick spray or vegetable oil
- Stand mixer with whisk attachment
- Candy thermometer

Pour one ½ cup cold water into the bowl of a stand-mixer, and sprinkle the gelatin on top. We’ll let this set while we prepare everything else, but have your whisk attachment ready.
Combine the remaining water, sugar, corn syrup, and salt in a small pot over medium high heat. Allow it to cook covered for four minutes. Then, insert your candy thermometer, and continue cooking until it reaches 240 degrees Fahrenheit, which is usually denoted on the thermometer as “soft ball.” Then, immediately remove from heat. Like, immediately guys. Right away, without delay. Like how I rhymed?
We’re now going to combine the gelatin and the hot syrup by pouring the syrup into the mixing bowl while it’s running on the lowest speed. You can then increase the speed to high (I go as high as possible) and let it whip for 13 minutes. Note: If your kitchen is hot and your mixer is older, it may overheat, and prevent the marshmallow goop from cooling off enough. I have had it happen. It sucks, and ruins everything. Make sure you have good ventilation, as the mixture should be luke warm (warmer than room temp, but not hot) when it’s done.
While it’s mixing, you can prepare your pans. I use a 13 by 9 inch glass pan. You’ll want to spray your pan (or otherwise coat it with a thin layer of vegetable oil), and then coat it with a mixture of the corn starch and powdered sugar. It’s a 1:1 ratio, and while ¼ cup is usually enough, you can easily make more or less as needed.
Don’t turn off the mixer when the 13 minutes is up – it’s now time to add the vanilla. Let it mix for another minute or so after adding the vanilla, and then turn it off. You can now pour the marshmallow fluff into the pan, taking care to smooth out the top with a spatula that’s been sprayed/coated with a bit of vegetable oil. You won't be able to get them anywhere near perfectly smooth, but I try to make them somewhat even.
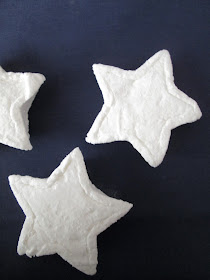
They’ll need to sit for at least four hours, after which you can cut them out, and use the remaining powdered sugar + corn starch mixture to coat the newly cut edges. I usually just cut them into 1-inch squares, but you can try any number of cookie cutters. I wouldn’t recommend Alton Brown’s piping bag method – it’s hard to get most of the fluff out of the bag, because it sets and firms up as it cools, so you end up wasting a lot. For the upcoming holiday I used star cookie cutters, and I saved the odd bits and edges for hot chocolate. They’ll last a long while in a plastic container or plastic bag – I’ve had them last as long as four weeks, but they may start getting a bit weird after that.
One note: I love roasting these over a fire, but they go much more quickly and easily than regular marshmallows. So, proceed with caution, because burned marshmallows are sad marshmallows.

Oh, and I found this awesome Pinterest board that is frequently updated with sinfully wonderful ways in which you can use these marshmallows. Salted carmel S'mores? I think yes.

I LOVE homemade marshmallows! They are so yummy, oh man! I bet they are good in a s'more! Thanks for sharing.
ReplyDeleteI do too Leslie! They are sooo much better!
DeleteOh these do look yummy! My great nieces and nephews would absolutely adore them. Thanks for sharing!
ReplyDeleteI hope they love them as much as I do! Thanks for stopping by
DeleteThese are too cute! Love the star shape, thanks for sharing at our Link it or Lump it party.
ReplyDeleteAs always, thanks for hosting a great party Amy!
DeleteThis would make a great hostess gift! I would love it if you would share it on my meet up Monday Blog Party!
ReplyDeletehttp://jennymaire.blogspot.com/
I hadn't thought of that, but you're right! I can totally picture a cute little mason jar of homemade marshmallows as a gift.
Deletecanlı sex hattı
ReplyDeletesalt likit
heets
arkadaşlık sitesi
HK4R
Great post thanks for writing
ReplyDelete