

While doing a little online shopping for things I won’t be able to afford for at least the next ten years, I came across this lovely bracelet (pictured below) that I absolutely had to have. The problem is it costs about a quarter’s worth of textbooks. Or 81 grande caramel frappucinos. Yeah no thanks – I’ll take the coffee.
 |
| THE INSPIRATION |
You need:
- 24 gauge gold beading wire - I purchased a 24 yard roll and had left over, but you will use quite a bit.
- 20 gauge gold beading wire - an 8 yard roll will be more than enough.
- Thick round cording – I used braided leather cording in a light cream color. Remember, the thicker the cording, the thicker your bracelet.
- A round bauble to be used as a clasp. It should be round-ish, although not a perfect ball. It’ll work best if it appears to be slightly squished so that the sides are narrower than it’s length. I purchased the Bead Landing “Specialty Findings” 64 piece pack from Michael’s.
- Scissors.
- Pliers.

Step
One
First, measure and cut a length of cording about as
long as the length around your wrist. It should be slightly shorter though,
because the clasp we make will add length. My first attempt ended up way too
big, so it will be worn as an anklet.
Step Two
To begin, create a loop of wire at the end of the cord
using the 24-gauge wire. Then wrap the wire tightly around the cord – see the
photo below for clarification. Each coil around the cord should be right up
against the previous, but don’t worry if it’s not totally perfect. Continue
wrapping as neatly and evenly as possible until you reach the other end.
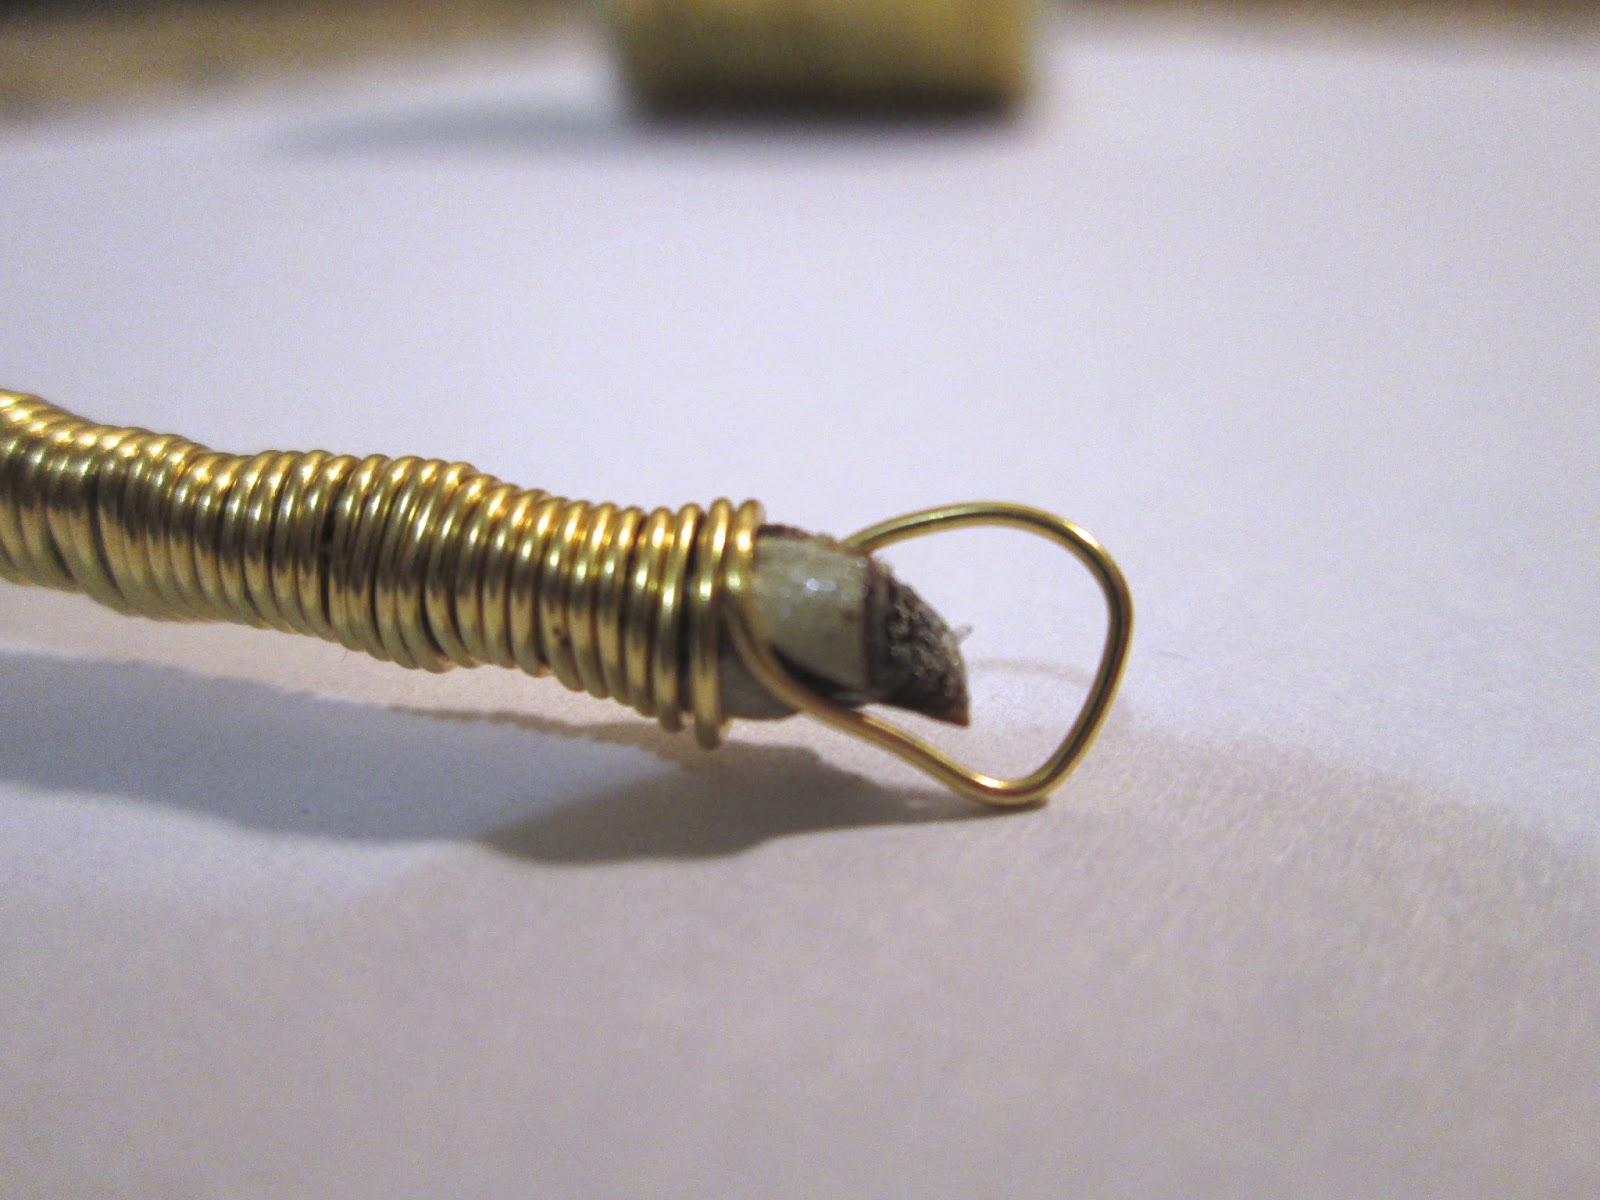
Step
Three
Once you have finished wrapping, you can end the
bracelet by looping the wire through the bauble. Loop it through twice, and
then cut the wire, leaving about an inch extra. That excess length can then be
wrapped back on itself at the end of the cording.

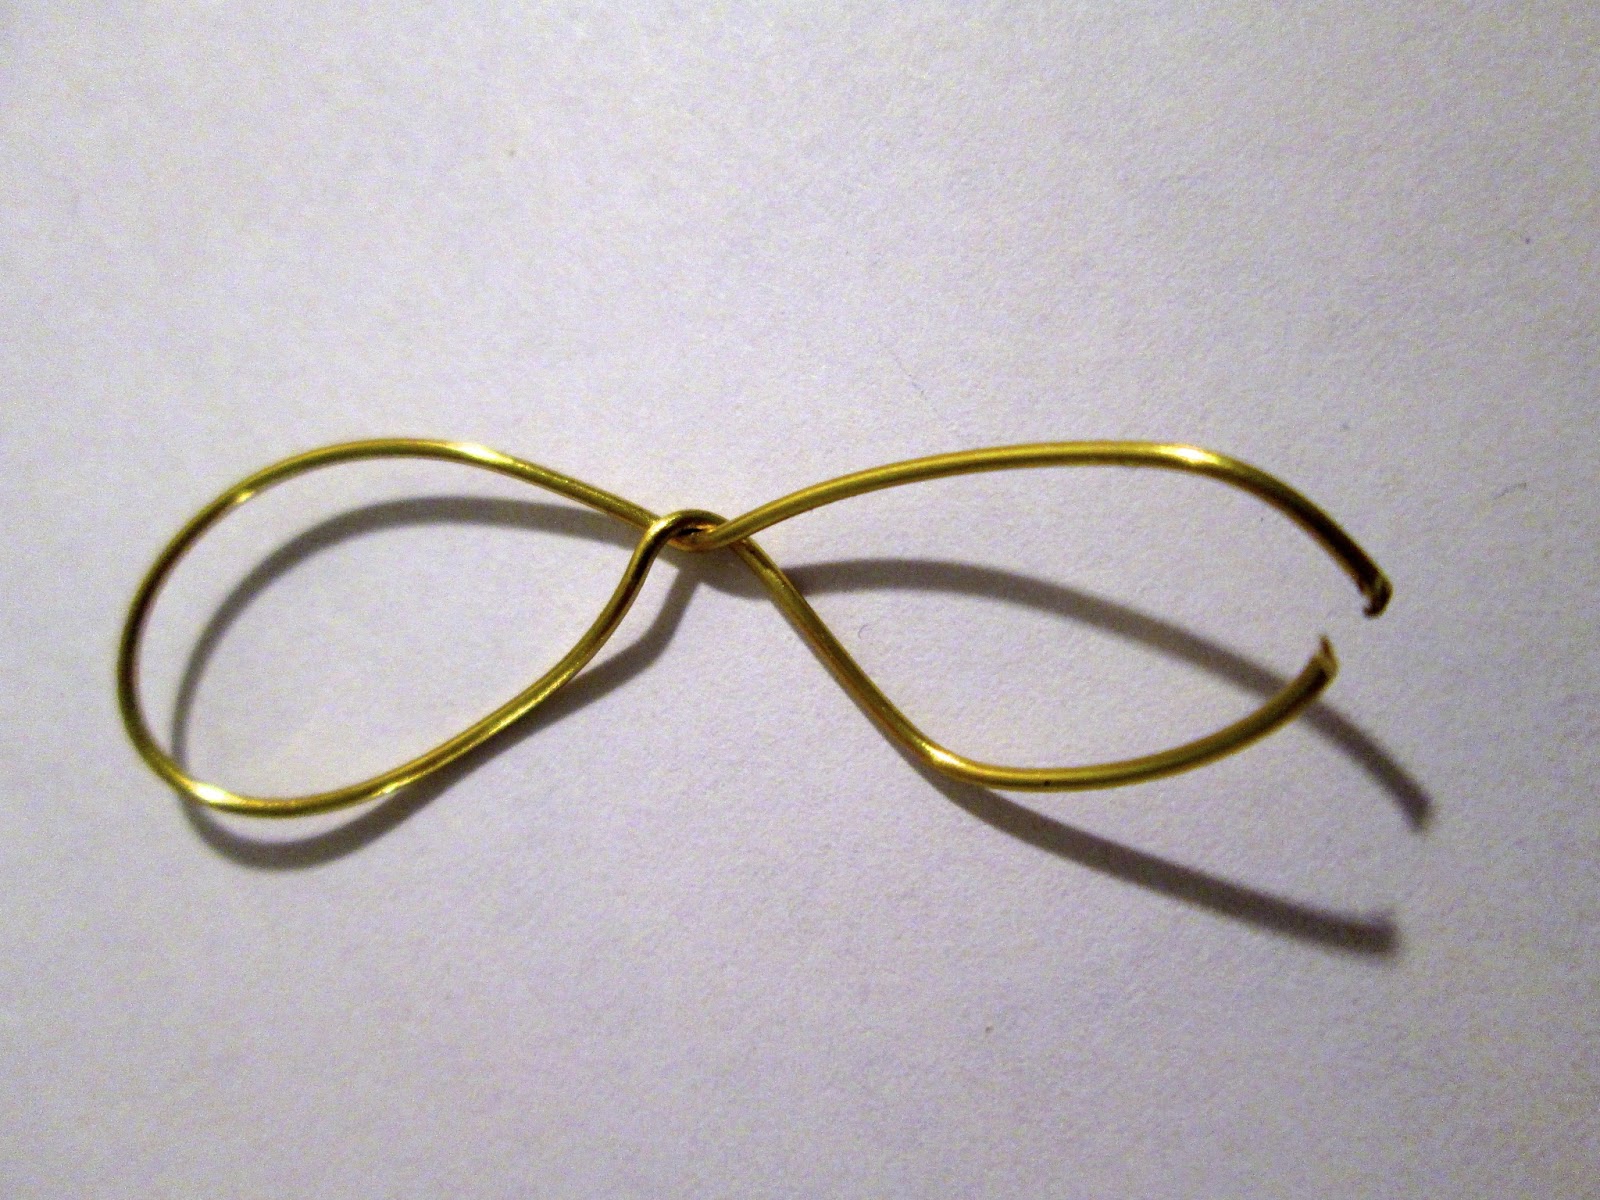
Step
Four
This next step is the
most complicated. To make the infinity shaped latch, first create an open-ended
figure eight with the 20-gauge wire. Then twist two long lengths of 24-gauge wire
together, and wrap those around the base. The twisted piece should go around
the base several times. Stop winding once you have reached one end and have
about an inch of wire left.

Step
Five
To attach the latch to the
bracelet, loop the end of the twisted wire (the part we left sticking out from
the latch) through the loop on the bracelet until it is secure.


Step
Six
This last step is the
least precise. Using the 24-gauge wire, haphazardly wrap the bracelet for a
second time. This final wrapping should be imprecise, with large gaps in-between
each loop, and with some loops over lapping. You can see the process in detail
in the following photos.


That’s it! I’m really
pleased with how it came out, and even more excited by the prospect of
customization. I think it’d be really fun to change things up a bit with additions
like rhinestones or multi-colored wire.

 |


Your version of the bracelet is stunning! Wow, so creative you are. Love it. I also love that you would rather have the coffee. :) Visiting via "MadeInADay" linkup
ReplyDeleteThanks Barb! As a college student, I need all the coffee I can get!
DeleteThanks for stopping by.
good one with wire
ReplyDeleteThank you!
DeleteThis is a beautiful version, I love how creative you've been. I thought the infinity bit was crocheted somehow when I first looked at the photos. I love a bit of on line window shopping myself!
ReplyDeleteThank you Julia! My favorite part of crafting is creating things that are much easier to make than they first appear. ;)
DeleteGorgeous! I love yours even more than the original! Thanks so much for linking up at Thursday STYLE :)
ReplyDeleteWhoa that looks like it took a lot of patience! Good job :) I fear I would have a pin-fail if I tried to do something like that... my wire doesn't always cooperate! Oh and I would pick the coffee too
ReplyDelete-Visiting from Link it or Lump It
It's actually not as challenging as it looks - you should give it a try!
Delete