

A few weeks ago I shared a round-up of awesome succulent projects with the promise that I'd get to my own tutorials asap. I'm super excited to share the first - a vertical (hanging) planter! It's insanely easy to put together, and much faster than the many other tutorials that have you building your own frames and boxes. At the end I've included a photo guide to the succulents I used. Happy Crafting!
You need:
- Picture frame – frames with wider borders tend to work better. It needs to be at least as wide as the edge of your box.
- Box base – I used a premade bamboo utensil organizer from Big Lots. The treated bamboo should hold up against the moisture of the soil, but you can definitely treat it with a sealant if you're worried.
- Plastic coated chicken wire.
- Gorilla Glue.
- Scissors/wire cutters.
- Pliers.
- Succuents! A photo guide to the plants I used is available at the end of this post.
- Succulent potting soil.
- Moss.
Step
One
First, measure and cut a length of chicken wire
that fits just inside the picture frame. This will then be secured with Gorilla
Glue around the outside edge. Leave it to dry for at least three hours. *Note:
Gorilla Glue is messy, impossible to remove from fingers, and will expand more
than you expect. Use caution, use less than you think you’ll need, and protect
your hands.

Step Two
After planning where each plant will go, cut
out squares large enough to accommodate the roots (slightly smaller than the
size of the container in which they came).

Step
Three
Once you have made enough holes, you can place
a sheet of moss along the inside of the wire – this will help prevent dirt and
moisture loss. I secured the moss along the edges with green twist-ties, and then removed moss that was directly above the holes we created in the wire.
Step
Four
Next, fill the box about 2/3
of the way with soil. You should leave enough space to accommodate the roots
and attached dirt of each plant. Then you can secure the photo frame to the top
of the box with more Gorilla Glue. It’s important to weigh down the frame to
ensure that it seals properly.

Step
Five
After allowing the box to dry
overnight, you can plant your succulents! Make sure to fill in any holes that
do not have plants with dirt, and you can slip more moss under the wiring if
needed.

Step
Six
 |
| My favorite - Graptoveria Olivia |
 |
| Graptosedum Vera Higgens beginning to blush in the post-rain sunlight |
A final note: you should hang your vertical planter from the box, not from the frame. This can be done with standard hanging hardware, chains/rope attached with screws, etc.
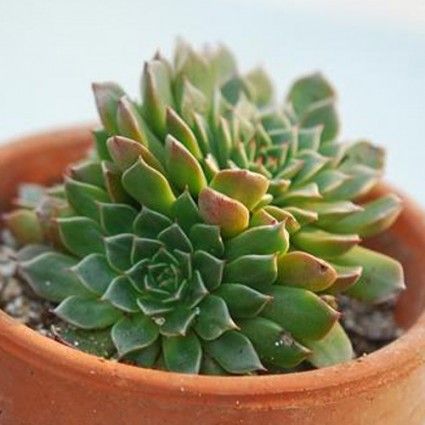
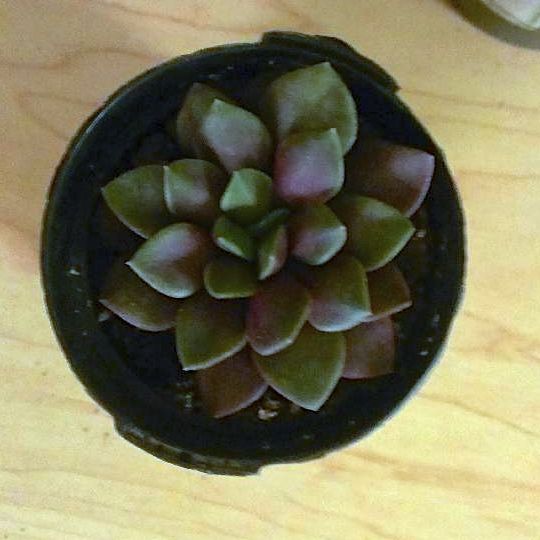
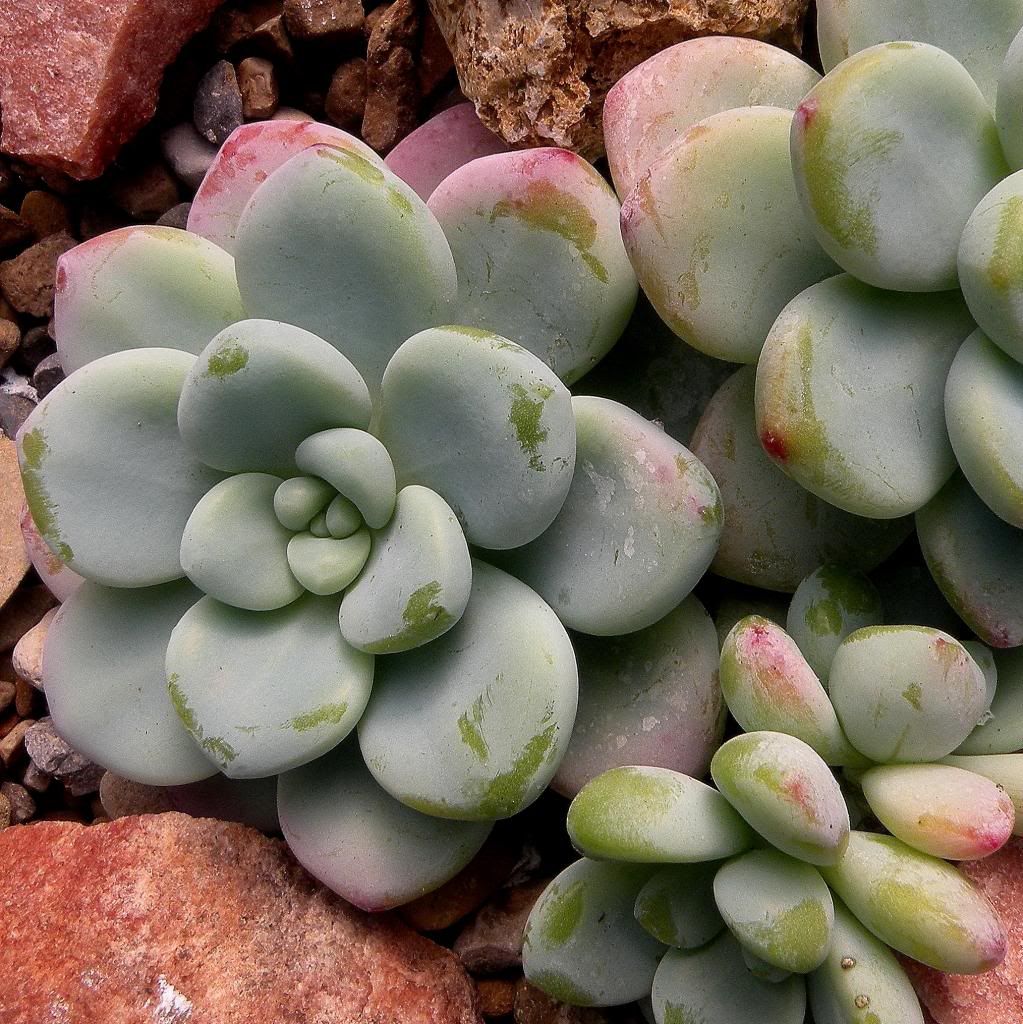
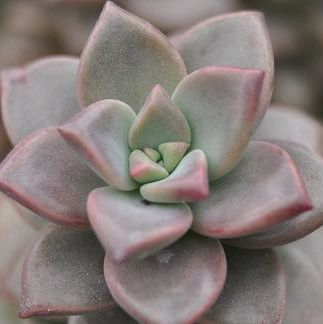
Succulent Guide
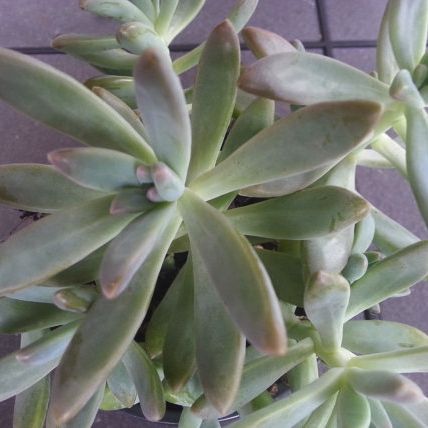
Graptoveria Olivia Pachyveria Blue Pearl
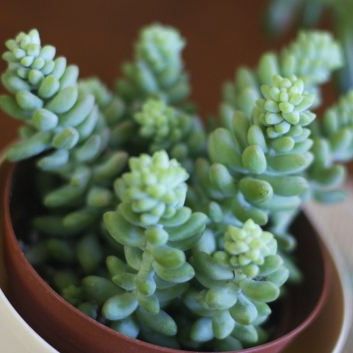
Donkey Tail Anacamperos Rufescens
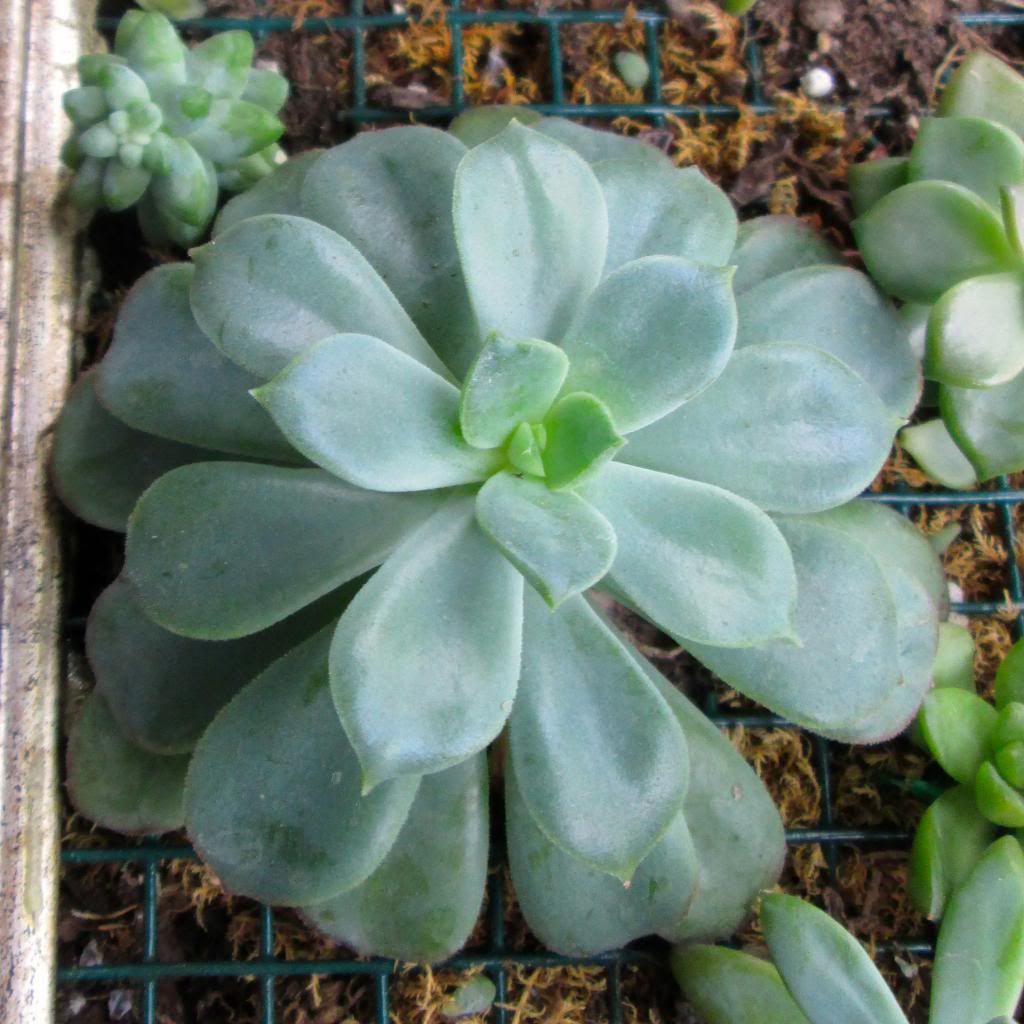
Echeveria Green Goddess Sedum Clavatum
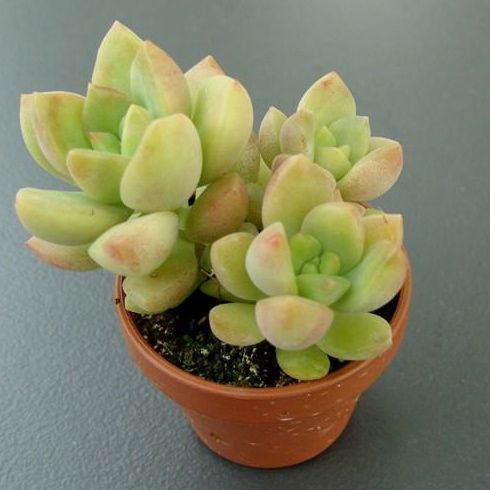
Graptosedum Vera Higgens Sedum Nussbaumerianum
Some final advice:
- Succulents are generally more fragile than other plants. Be gentle, and make sure to support the entire plant when transplanting them.
- If you do accidentally break off a leaf or two, don't toss it in the greenery bin. Succulents, unlike most plants, can be propagated, which basically means that new plants will grow from leaves and stems. You can find directions and photo tutorials on the propagation process from big names like Martha Stewart and Better Homes and Gardens, but I've found that the tried and true advice from fellow bloggers has been the most helpful.
- Succulents need far less water than other plants, and over watering can lead to health problems. As a general rule of thumb, only water when the dirt is dry, which may take a few days to a few weeks depending on your climate. Hanging planters should be taken down for watering, and you should let it sit for a few hours to make sure the water has been absorbed before re-hanging.
Holy Cow! This project was featured on FOURTEEN blogs, which blows my mind and humbles my heart. Thank you to everyone who has been sharing/supporting - it seriously means the world to me. :)


Hey... I've nominated you for a Liebster Award! If you'd like to participate visit my blog to check out all the rules and see how it works! www.suburbanhippiehomestead.com
ReplyDeleteOh wow thank you! I'd love to participate in the blogging fun. :)
DeleteI'm a nut for succulents and have been wanting to try these living walls forever! Please stop by and share at our link party going on right now, if you've not already.
ReplyDeletehttp://www.delineateyourdwelling.com/2014/03/link-it-or-lump-it-no-28.html
I participate in Link it or Lump it every week! Thanks so much for stopping by. :)
DeleteSuch a great tutorial, I've always wanted to try this. I love that you used a utensil holder for the box because the idea of building one was intimidating to me. I'm visiting from the Much Ado About Monday Linky on Huckleberry Love!
ReplyDeleteDanielle @ Stickelberry
I'm so glad you found it helpful! :)
DeleteHow great! I love this! I would love if you would please come share this at our MaMade blog hop! http://mommylikewhoa.com/2014/03/mamade-blog-hop-5/
ReplyDeleteI love it! Now I need to find a place to hang something like this. I can already see my husband rolling his eyes at me :-)
ReplyDeleteI thin they're great outdoors (patio, etc), but I really love the idea of hanging them inside - just need to find a room that's sunny enough :)
DeleteI want one but I don't think I can do it thanks for sharing you do good. Visiting from link'n blogs hop have a great day
ReplyDeleteThanks Robin, I hope you have a great day too :)
DeleteThese are really cute, I want to do it with my kids. The love making things and this definitely seems right down our ally :) Thank you for linking up to the MaMade Blog Hop
ReplyDeleteAwesome, I'm so glad to hear that! This is definitely a good one for kids because it's so simple. Hope you all have fun!
DeleteI LOVE, LOVE this project!! So cool! I pinned a bunch of these vertical planters for when we get a house (hopefully in the next couple of months), but couldn't find a good tutorial until now! Thank you so much for linking up at Thursday STYLE! Looking forward to some Anthro projects in April with ya :) Have a great weekend!
ReplyDeleteThanks Angela, and thanks for a great party! I'm super excited too!
DeleteThanks for the great link on Craft Frenzy Friday! I will be featuring you on my Saturday Spotlight tomorrow morning! :o) Stop by, share and grab a featured button! http://pickledokra.blogspot.com/
ReplyDeleteOh man how exciting!! I am beyond honored. Thank you!
DeleteI wanted to let you know I will be featuring this beauty on Sunday at our link it or lump it party. I'll also be pinning to our pinterest board. Be sure to stop by and grab a feature button!
ReplyDeletehttp://www.delineateyourdwelling.com/2014/03/link-it-or-lump-it-party-no-29.html
There aren't even words to describe how thrilled I am. Thank you!!
DeleteWonderful project. I just bought some succulents yesterday that I plan to arrange this weekend. Love this idea! Thanks for linking up at Thursday STYLE!
ReplyDeleteThank you, and thanks for stopping by!
DeleteThis is so clever! what a great idea!! Thanks for sharing.
ReplyDeleteMaddles, Maddles Made
Thank you Madeleine! and thanks for stopping by + taking the time to comment :) Comments like yours are always a great way to start the day!
DeleteThis is very pretty. Also convenient for keeping the plants away from cats!
ReplyDeleteThat's a fabulous point Betsy! I bet it'll do a good job of keeping them away from kids too ;)
DeleteThis is so great! Love, love it!
ReplyDeleteThank you!!
DeleteHi there! Thank you so much for linking up to the Link It or Lump It Link Party! I adore vertical succulent planter. It's stunning! I have picked it as one of my features this week. Come on over and grab a button and link up again! http://www.twoityourself.com/2014/03/link-it-or-lump-it-link-party-28-plus.html#more
ReplyDeleteMelissa
I did, thank you! It's always an amazing feeling to be featured on another blog. :)
DeleteI heart this so flippin much! This would look so cute in my bathroom! Thanks so much for sharing! My friends and I started a lifestyle link party where we focus on interior design, health, fashion, beauty, and things we find inspirational! You'd be the perfect person to link up to our party, here's the url: http://www.frysauceandgrits.com/2014/03/beyoutiful-link-party-10.html
ReplyDeleteAwesome Courtney thanks for letting me know. I'll be sure to check it out. :)
DeleteI ABSOLUTELY love this Brittany! I've had my eye on vertical succulent planters since last spring and it was on my to do list back then. Maybe I can get around to this spring with your great tutorial! Thanks so much for sharing at The Creative Connection!
ReplyDeleteThanks Chelsea - I'm so glad you found it helpful :)
DeleteThis is so amazing! I LOVE this idea and need to add it to my to do list. Thanks for sharing! Pinned :)
ReplyDeleteAww thanks :)
DeleteYou've been featured at Link'n Blogs! The party goes live tonight at 10pm MST, so stop by to see your feature. Congrats! :)
ReplyDeletehttp://iputabirdonit.blogspot.com/2014/03/linkn-blogs-16-giveaway.html
xo
Daniela
Oh awesome thank you!! I'm flattered. :D
DeleteThis is so awesome Brittany! I am sharing this on Google+ right now! :)
ReplyDeleteOh thanks Britany ;)
DeleteWow!nice article and very awesome information about the succulent planters diy good work.
ReplyDeletesucculent planters diy
You have some honest ideas about the smart glass share here I really get many information and discovered most peoples will agree with your blog.
ReplyDeletesmart glass
Very nice work
ReplyDelete