

Today I'm taking Anthro Knock-off Week into the kitchen with these fun plated serving utensils. Who doesn't need a little sparkle and shine in their life? I know I do!
As a side note, the last Monday of the month is usually supposed to be a post in the 5-minute Series. Since Anthro Week overlapped, it will resume next month!

You need:
- Wood serving set. I like light wood, but they can be any color/type of wood, and both stained and unstained.
- Liquid gilding. I used Martha Stewart brand in Gold.
- Painter’s Tape or a Pencil.
- Cheap-o paintbrushes – seriously, get the cheapest you can because we’re going to be throwing them away. The clean-up of the liquid gilding is really not worth the trouble.
- Regular old gold or neutral acrylic craft paint.
- Liquid gilding sealant.
Precrafting prep: Open all
the windows, lay down some newspaper, and try not to pass out once you’ve
started. If your work area doesn’t get good ventilation, you’ll want to move
outside.
Step
One
First, figure out how long you want the gilded
portion of your handle to be – I did four inches. Then, either tape it off or
mark it with a pencil.
Step Two
If your utensils are varnished or otherwise
sealed, you can skip this step. If they’re like most wood utensils and they’re
pretty much raw wood, you’ll need to seal off the soon to be gilded area with
craft paint (or the official Martha Stewart primer…but ain’t nobody got money
for that). One generous layer should be enough.
Step
Three
It’s time to make like King Midas and gild gild
gild. So, here’s the plan – paint quickly but evenly, and as soon as you’re
done with the first layer on both utensils, throw away the paintbrush and leave the room. Seriously. It's that strong. You can
use xylene to clean the brushes, but really, why bother? It’s a nightmare to get it
all off, and the cost of buying the cleaner is higher than the cost of a dollar
store brush set.

Step
Four
After the
first layer has dried, you can do a second layer. I did four (maybe? I lost
count…) total, but it’s really up to you and how perfectly smooth you want them
to be.

Step
Five
Now, this is the tricky part. The
gilded handles need to be sealed to prevent tarnishing. Martha Stewart and few
other companies make official sealants for liquid gilding, but me being the
overconfident crafter that I am, I decided I didn’t want to pay the price when
I had perfectly good clear acrylic spray at home. So I did all the work of
painting, let them dry for a few days, and then took them outside and sprayed
away. And guess what? My hubris came back to bite me when the liquid gilding
reacted with the spray and changed colors. They went from a perfectly beautiful
yellow gold to an equally metallic and beautiful but not intended pinkish
copper. They’re still pretty – just not quite what I expected. So, the moral of
this story is, if you want them to stay the exact color you originally planned,
trust Martha - I’ve heard she kind of knows what she’s talking about.

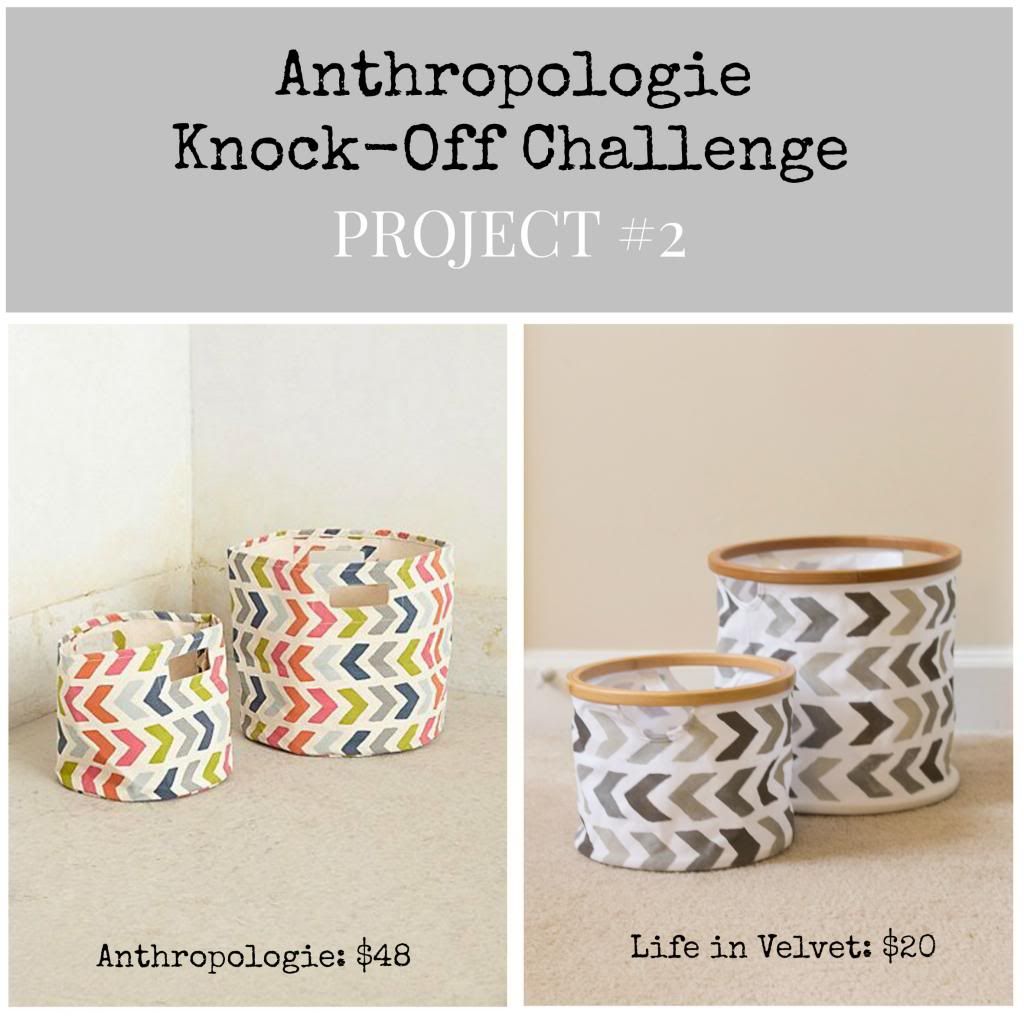
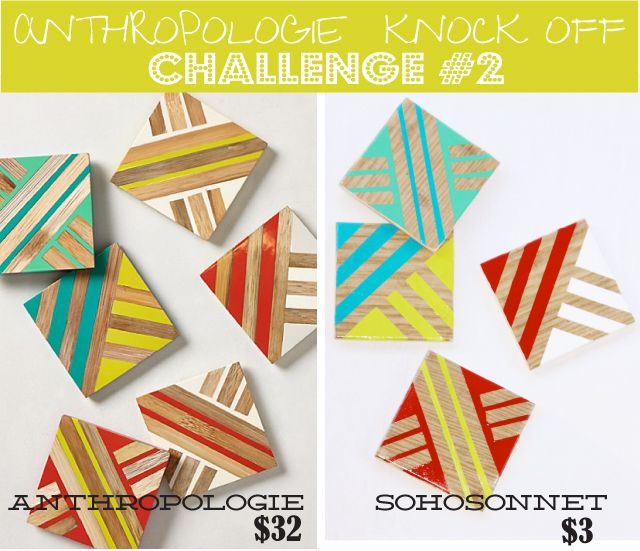
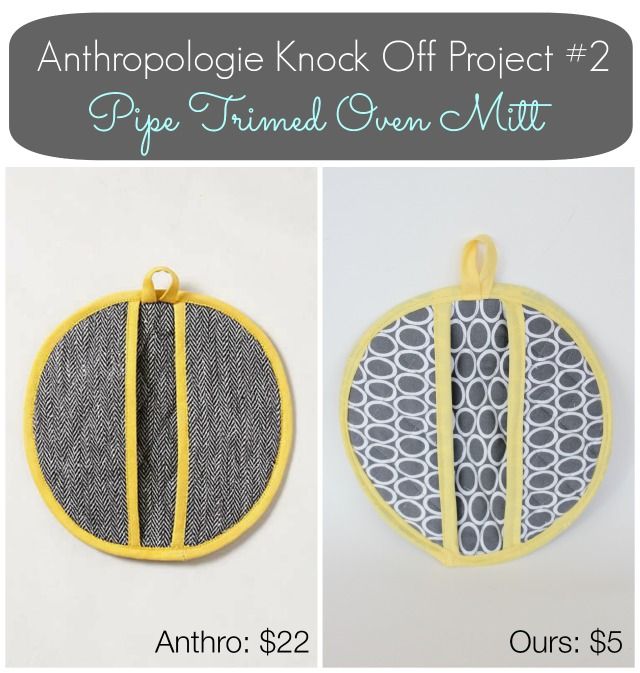
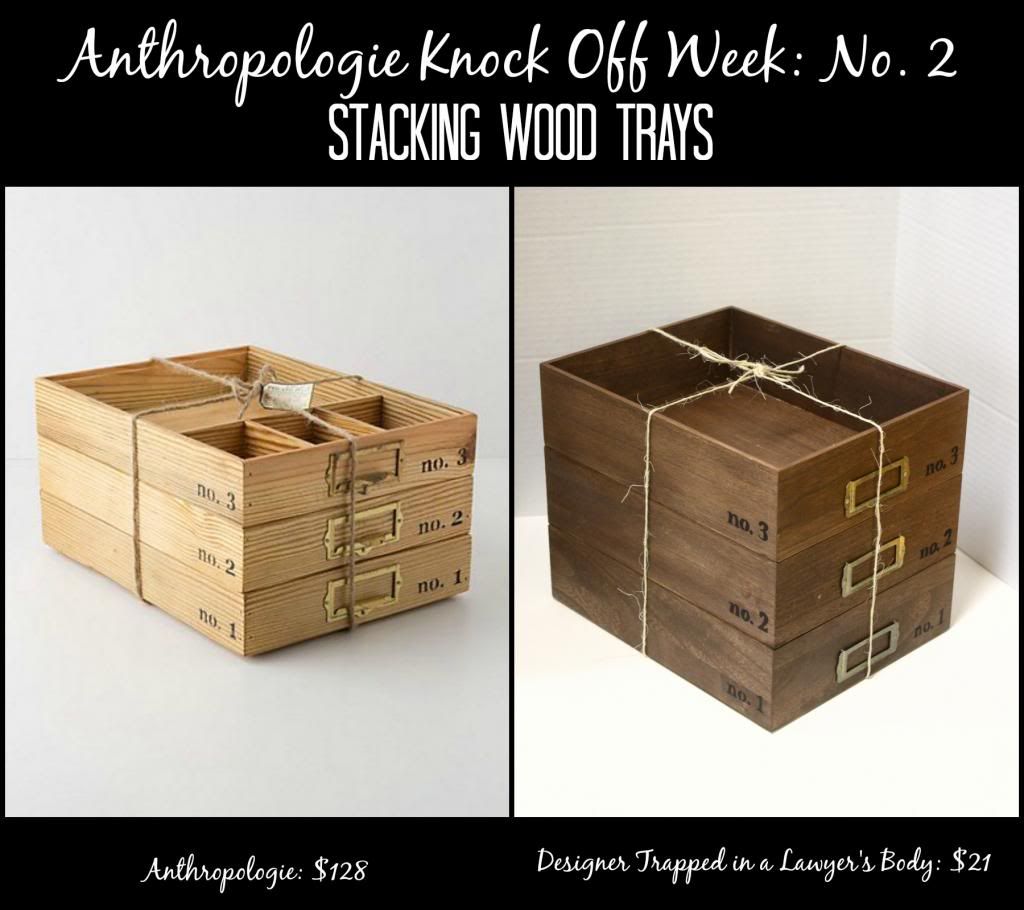
This post is part of Anthropologie Knock-off Week! I've joined up with four other bloggers to bring you 30 fun Anthro themed tutorials. To see what our other bloggers have shared today, take a look at the photos below. Happy crafting!


Gorgeous, and so simple! What a fabulous project! Love these!
ReplyDeleteThanks Angela! Simplicity is, in my opinion, the best way. :)
DeleteLove it! Great job, so easy yet so gorgeous!
ReplyDeleteI don't know if you've had the time, but you should take a look at the variety of liquid gilding they have - there's a color to fit literally every home decor scheme. :)
DeleteWhat a perfect project for me to pass on to my YUMeating readers! I can't wait to give this a try. Thank you.
ReplyDeleteI'm happy to hear that! I hope they like it as much as I do.
DeleteGreat easy project!! And since I have some extra wooden utensils and some paint, it won't cost me a penny!!
ReplyDeleteFree projects are the best projects aren't they? I'm glad you found the tutorial inspiring!
DeleteI love this series you ladies are putting together. This is a great way to show DIY projects that can save $$$. Can't wait to visit everyone and see all the projects.
ReplyDeleteThanks Erlene! We've been having a ton of fun preparing everything, and it's so nice to hear that out readers are enjoying it just as much.
DeleteYou girls are doing an amazing job with all the knock off project and it's only day 2. I can't wait to see what your guys have in store for the rest of the week. I really love what you did with the serving set. You always have to have a little sparkle in the kitchens.
ReplyDeleteThank you Courtney! Sparkle is very important - I can't wait for you to see what I have planned for Wednesday. Hint: it's a sparkly piece of hardware....
DeleteI love this so much! I can't wait to glam up my own wooden spoons. Thank you so much for sharing over at Much Ado About Monday. We are featuring your amazing spoons this week. :)
ReplyDeleteThat's great, thanks for letting me know!!
DeleteI actually like yours the color it turned out better than the real ones anyway! That is really great! Thanks for linking up to the Bloggers Brags Pinterest Party. I've pinned your post to the Bloggers Brags Pinterest Board
ReplyDeleteOh thanks Tammy! It was very unexpected, but in the end I'm happy with the way it turned out. Thanks for pinning!
DeleteThanks for linking to last weeks Whimsy Wednesday! Love your serving set and featured it today! You can see the post here...
ReplyDeletehttp://www.ohmy-creative.com/party-favor/pretty-diy-bridal-shower-favors/
Have a lovely week and hope to see you link up again tomorrow night!
Oh yay! I will be sure to check it out. Thank you.
DeleteI just wanted to let you know that this post was featured on my Father's Day Inspiration post. :) Thanks for the inspiration! http://bumblebreeblog.com/2014/06/01/metal-leafing-inspiration-fathers-day/
ReplyDeleteThanks for letting me know Bree!
Delete